CHAT WITH CONSULTANT
04-3232530 Camzilla PhotoDepot

04-3232530 Camzilla PhotoDepot
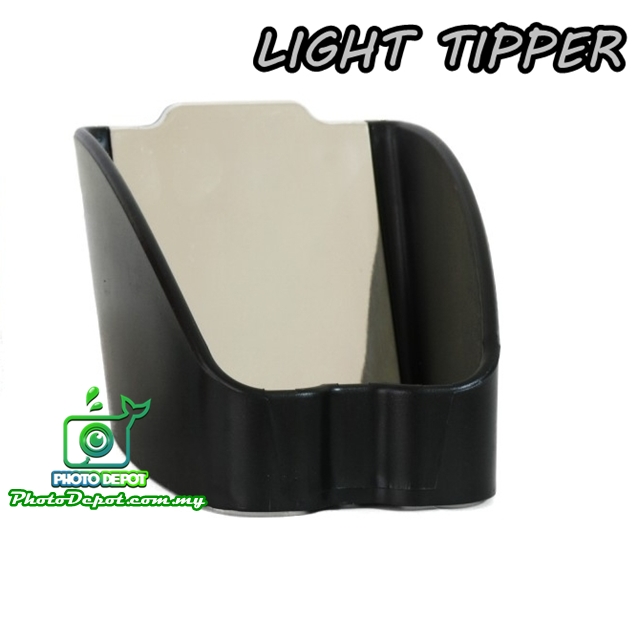
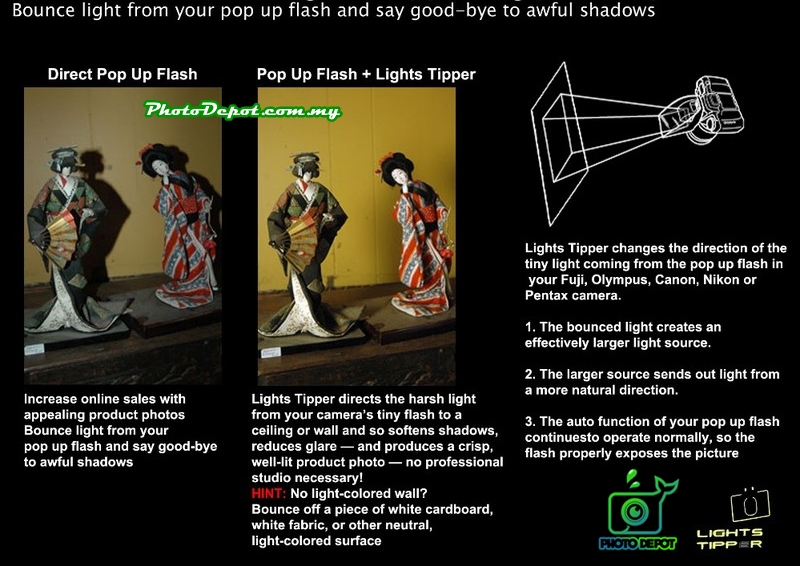
What is Light Tipper?
Similar design to Professor Kobre's Lightscoop® (which costs ~ USD29.95), Light Tipper redirects the tiny pop-up flash light source to the ceiling or wall, and hence creates a softer, more diffused light coming from a natural direction. It transforms the direct harsh light from your tiny pop-up flash into pro-quality light that improves your photos.
Compatibility:
Compatible with Canon, Nikon, Fuji, Olympus, Panasonic Lumix, Pentax, Sigma or other DSLRs with standard ISO hotshoe (except Sony, Konica, Minolta with unique hot-shoe).
Canon : 6D, 7D, 10D, 20D, 30D, 40D, 50D, 60D, Rebel XTi, XSi, 400, 450, XT, XTi, T1i, T2i, XS, 350D, 500D, 550D, 1000D.
Nikon : D40, D40x, D50, D60, D70, D70s, D80, D90, D100, D200, D300, D700, D3000, D3100, D5000, D7000
Fuji : FinePix Pro Series
Olympus : E420, E520, E3, E620
Panasonic Lumix : DMC-G2K
Pentax : K-7, KX, K10D, K100D, K20D, K200D
Sigma : SD14 Series
Usage:
Light Tipper will redirects the harsh light coming from your DSLR’s pop-up flash to a ceiling or wall, and hence
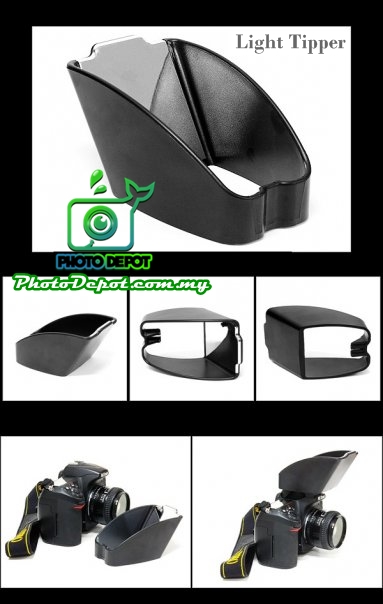
Note : This smart low-tech device does not replace fully-featured and more powerful tilting external flashes for advanced or professional photographers who need them. That’s a whole other class of equipment.
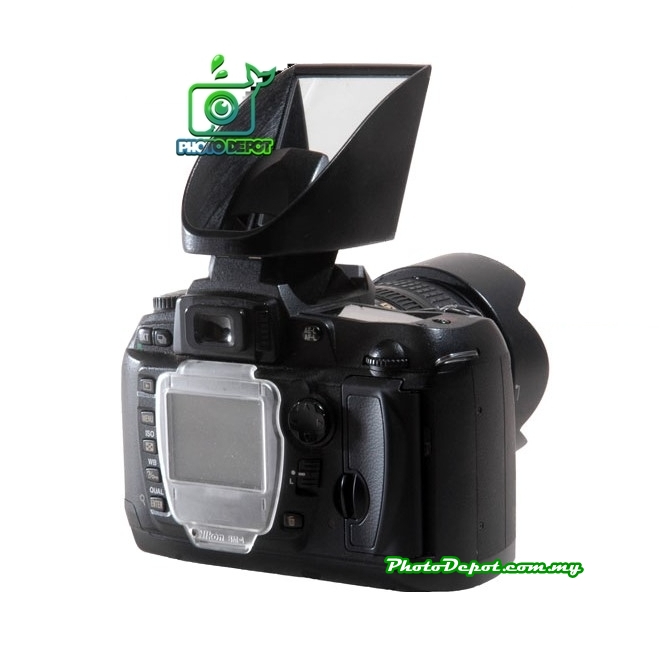
How to use Light Tipper?
1. Slip the Light Tipper over the flash in its pop-up position.
2. Slide the foot of the Light Tipper into the DSLR’s hot-shoe.
3. The internal flash and the electronics in your Nikon, Canon, Pentax, Fuji FinePix Pro, Olympus, or Sigma DSLR, aided by the Light Tipper's reflector, will do the rest.
What conditions are suitable for Light Tipper?
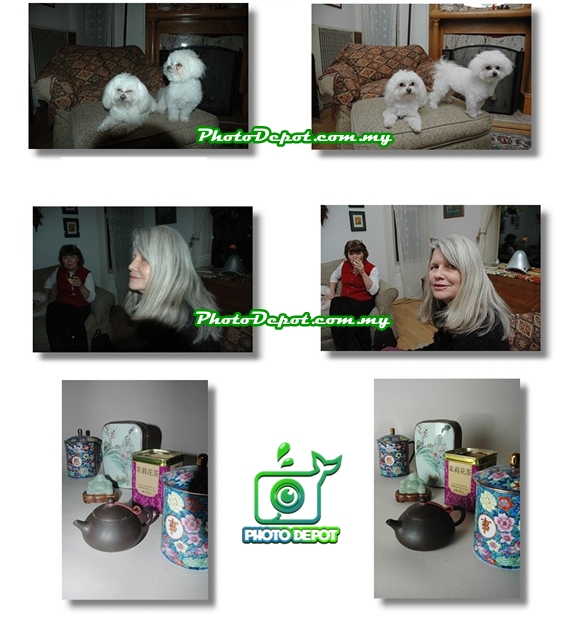
How to make the most out of Light Tipper?
The following camera settings are designed to get the maximum light output when bouncing the pop-up flash.
1. Turn on the camera.
2. This is only applicable for Nikon. Set the Exposure Metering pattern of the camera to Spot Meter. This is essential for Nikon. For other DSLR, center-weight average, evaluative etc will work.
3. Set the DSLR camera to operate on Manual exposure mode (M) [NOT Manual Focus].
4. Set the ISO to 800. (For Nikon D90 or D700, ISO increment to 1600 or 3200 allows zooming lenses to a longer focal lengths & hence produces excellent results.)
5. Select the widest lens aperture — f2.8, f3.5, or f4.0 depending on your lens.
6. Set the DSLR camera’s shutter speed to 1/200 or 1/160.
7. Select Flash “on” (front curtain sync) — NO red-eye reduction, slow sync etc.
8. Select Flash Exposure Compensation (also called Flash Adjustment on Panasonic Lumix) to +1, +2, or +3 depending on your DSLR camera and situation. Do NOT change your camera’s exposure compensation, which is a different setting.
9. Select TTL (through-the-lens) metering for your flash.
 Camera Bag


 Battery & charger


 Camera DSLR
  Camera Lens


 Flash Accessories
")
")
")
")
")
")
")
")

 - Copy-165x165.png)

-165x165.jpeg)